If You Cant Find A Colour You Need Let Us Know & We Can Make It!
Join Our Distribution Network Europe Or Worldwide > Contact us
Are you tired of inferior leather dye, poor adhesion & wear resistance? Try the best forget the rest
Showing all 5 results


Keeping leather fresh is a difficult task, and here at The Leather Colour Doctor we know that all too well.
Whether it's leather furniture, leather garments, or your leather car seats, leather needs protection in a way that other textile materials simply don't.
You can find all sorts of info on our website about the correct leather dye or leather cleaner for your situation, but today we'll be focussing on Ford leather dye, so your old leather car seats can be refreshed to look like new.
How do you do it, and what do you use? Well, stick with us here at The Leather Colour Doctor and we'll explain exactly that!
Believe it or not, different leather is used for different situations. Car leather is generally stiffer and thicker, in order to deal with frequent use. It also uses UV filters (UV filters protect against the sun's rays on the road, so faded leather becomes less of a problem), and therefore needs special attention compared to other leathers.
Furniture leather, by comparison, is usually a little more flexible and softer for comfort, and doesn't use UV filters, nor is it as protected as car leather from abrasions and stretching.
To highlight that you can't use the same leather cleaner or leather cleaning method for both types of leather. It's really important that you focus on treating every leather differently so you can:
Using the wrong leather cleaner, leather protector, leather cleaning brush, and leather fresh dye kit could possibly destroy your Ford leather seats.
But don't worry, that's why your friendly helpers at The Leather Colour Doctor are on hand to help!
Before we talk about the specific products we offer for your Ford, we just wanted to highlight exactly what you'll need from a leather kit. We don't recommend you put together a kit of your own as you might purchase the wrong products (if you're unsure about which products you need exactly, you can always get a free consultation with us and we can discuss if we'll be able to freshen up your leather for you), but knowing which products will be used on your car seats can be helpful.
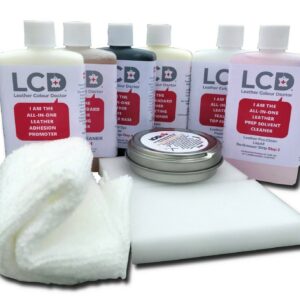
So, here's everything that should be included:
And although these products are all great and are easy to apply, here at The Leather Colour Doctor we offer a range of products specifically manufactured to suit your Ford car interior to bring its old and valuable leathers back to life.
From this point in, we'll be focussing on explaining our range of products in greater depth, explaining what each one will do for the leather, and explaining how to actually apply it yourself in case you purchase a Ford leather kit from us to do it yourself at home, rather than having us do it for you.
Below we'll be using our Ford Capri Raven Grey Leather Kit as an example, to highlight what our high quality Ford products can do for you, and explain how you can use our kits at home yourself to freshen up old leather, treat your seats to make your leather soft and comfortable again, and return your seats to the leather's original colour.
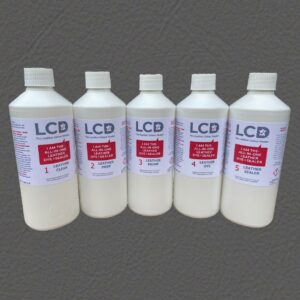
To kick things off, you'll need to use the leather cleaner in the pack - helpfully labelled bottle 1. Before getting started, you'll need a few other things for this step too:
Start by applying the cleaner on to a small leather sample (the vehicle seat side bolsters or other similar lesser seen area is a good idea). Our products are designed for your Ford car seats and are only a mild leather cleaner, but making sure it reacts with your leather chairs effectively is always a good idea.
Leave for 5 minutes before wiping away.
If your leather is cleaner but otherwise has no changes or damage, then you can proceed by taking the leather cleaning foam dispenser bottle and applying it on to the leather - using a soft plastic leather cleaning brush to work the cleaner into the leather gently.
Leave for 5 minutes so the cleaner can lift the dirt and grime away, then simply use a cleaning sponge or slightly moist cloth to remove dirty foam, which will appear after years of not cleaning your porous leathers.
Repeat this process as needed until you can wipe the seats and the cloth comes away clean.
The leather cleaner gently cleans away all the old dirt and grime, much of which will be responsible for your leather's decay/colour fading.
Next up is the leather prep solvent, which is designed to strip away the old sealing layer so you can prepare your leather for more treatment and keep the leather supple.
Use the second bottle to wipe over the Ford seats with a new, clean cloth. Wipe over the entire seat area, including the headrest, backrest, etc., until some of the pigment of the leather comes away on the cloth. This shows that you've removed the old sealing layer and can move on to the next steps.
At this stage, you can use our leather filler to repair any damaged or scratched leather. After filling, take a leather sanding pad that lightly scratches leather fresh again.
Then wipe down the seat, ready for the next stage.
Now it's time for bottle 3: leather primer.
This is designed to make the leather's surface more susceptible to the dye.
Only treat surfaces where colour change is needed, or else mixing colour on parts that don't require it could make the leather a different colour.
Using a clean sponge, apply multiple thin layers, being sure to wear a protective glove as you do and dry in between layers with a hair dryer. 3 applications should suffice.
With each new application, make sure you wipe in a different direction to encourage better adhesion later.
Step four requires bottle number 4: the leather dye.
Again, it's a good idea to test on a small patch first that's less visible to confirm colour matching, as is the case with all cleaning or colouring products.
If the colour match is right, then take a new sponge and apply a first, thin layer on to the areas of the leather seats that need colour.
Dry with a hair dryer again between each layer.
At first, the dye will appear patchy. This is normal and is common with all dyes.
Just keep applying thin layers and drying with a hair dryer until you achieve a close match.
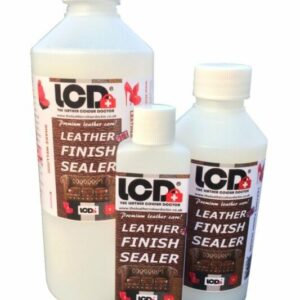
The final step involves the leather sealer, which acts as a leather protector.
When you apply leather protector, this treatment prevents dirt sticking and will keep your leather seats and new leather dye protected in the future.
Apply with a clean sponge again, using multiple layers to protect the seats. Use a hair dryer again between each layer.
By alternating the direction of the coat at a 45-degree angle, you can scatter light reflection on the seat's surface, helping the leather dye and leather seats look its best.
After following all the steps using our Ford leather dye kit, simply leave the chairs to dry for 24 hours and your interior should be as good as new.
Don't feel confident doing this type of task yourself? Need further advice? Would you rather a professional fix your Ford leather for you? If you answered yes to any of those questions, don't worry! Just reach out to us here at The Leather Colour Doctor today, and we can arrange a free consultation and let you know how we can help. We look forward to hearing from you!