If You Cant Find A Colour You Need Let Us Know & We Can Make It!
Join Our Distribution Network Europe Or Worldwide > Contact us
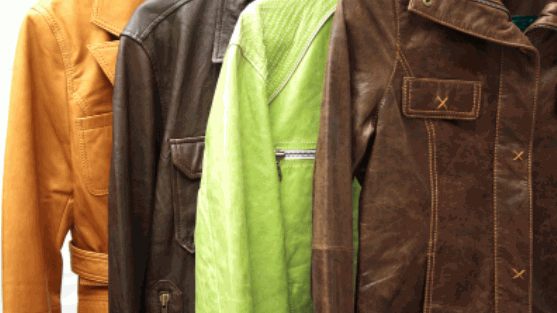
Is there a more luxurious material than leather? Whether it's the way it makes us feel when we wear it, the pleasing aroma, or the combination of natural strength and softness, leather just works on many levels.
But what do you do when your favourite leather jacket starts to look faded and worn? Leather ages naturally, which actually improves its look, but when the colour fades or the surface becomes scuffed and patchy, it loses its appeal. Well, why not dye leather yourself?
Yes! It's perfectly possible to dye leather jackets in the comfort of your own home, and with minimum effort. So, how exactly is it done?
Thankfully, the Leather Colour Doctor is here with a step-by-step guide on how to dye a leather jacket. Follow this guide to breathe new life into your treasured leather jacket, and you'll soon be wearing it again with pride!
First, here are some items you might need, so make sure these are accessible before you start work:
You may not need them all, but it saves time if you have them to hand.
If your leather jacket is heavily soiled, it's no use putting a layer of dye over the top of all that dirt. You might have come to appreciate the live-in look of your favourite leather coat, but you'll thank yourself later if you clean it now. If you skip this stage, it's likely that the finish will be patchy, your jacket won't last as long, and the new dye will soon flake away.
Always check the care label on the item before cleaning and use the appropriate method to get it cleaned. Alternatively, you can use our own prep fluid to get your leather jacket clean.

This stuff works like magic! It penetrates the grain to give a thorough deep clean, stripping away grease, grime, dust, oil and dirt. It also removes any matt or gloss sealants (including wax and silicon) to allow better adhesion in the dyeing process.
Apply the preparation fluid with a soft cloth and gently scrub the surface with an abrasive pad. Wipe it down until the cloth comes away clean, then leave it to dry fully before applying the leather dye.
If your leather jacket doesn't need cleaning, you might want to consider rubbing in a light layer of olive oil to hydrate the surface.
It's all very well having a bright, clean jacket that looks new, but if there are small holes, rips, scratches or scuffed patches, it still won't look great.
To get this fixed, you could take your leather clothing to a specialist repair shop, but this might be pricey. For large rips, this might be necessary, or you could get some contact cement and follow the instructions.
Another alternative - particularly for smaller repairs - is to use our leather repair filler paste*. The great news is that if you already used our leather prep fluid, the repair paste will work even better!
Apply this to damaged leather in a thin layer using a spatula, and leave it to dry or use a hairdryer or heat gun (on a low setting and not too close to the surface!).
Add more thin coats and dry them in between until you are happy that the damage is covered. When the final layer is dry, rub it down lightly with an 800-grit sandpaper to get a smooth surface ready for the dye.
*Please note that our leather repair paste is not suitable for nubuck or suede leather.

Before dyeing leather of any kind, there's one thing you must do: test the dye on an inconspicuous area first!
Add a small amount of dye to an area that isn't usually on display, then check the results when it's fully dry. If you're happy with the colour and finish, carry on with the dyeing process. If not, you could try mixing different dyes to get the colour that you want.
When you're ready to continue, here's what to do next:

Find a well-ventilated space; although the dye is water-based, it will still give off fumes.
Lay newspapers or a protective sheet on a flat surface in case of drips and spills - you don't want that leather dye to spoil your table, carpet or laminate floor!
This is important as leather dyes can seriously stain your skin. Although all Leather Colour Doctor leather dye is non-toxic, there's still a risk of chemical burns or that you'll react badly to the ingredients. So, get those gloves on!

Lay the leather jacket flat on the prepared surface and spread the first coat of dye in a thin layer using a sponge or brush (or put the leather dye into a spray bottle if you feel confident enough to use this method).
Use thick strokes and rub in a circular motion to get the best results, then let this layer dry (or use a hairdryer). Next, apply multiple coats to the leather surface, and don't forget to work the dye into the seams and thicker areas. These coats can be applied more thickly, but mop up any excess dye using a paper towel.
Also, always let the dye dry before adding the next. The more leather jacket dyes you use, the stronger the final colour will be! So, if it doesn't look as you'd like it, add more dye.
The key to your success is to take your time over this process - it's not a race, so don't hurry it or you might mess up.
If you want to create a new look, maybe by using contrasting colours on different areas, cover up the parts you don't want to dye as you work your way across the leather.
The same applies if you only want to revitalise part of your coat rather than the whole thing, or if there are details (like decorative buckles) that you don't want to be covered with dye.
Don't forget: if you want to change the colour, you can't lighten dark colours. For example, if you have a black leather jacket you can't simply add brown or light blue leather dye - you'll end up with a big mess! However, if you apply darker shades to a light-coloured jacket, you can create a stunning new look.
Now, adding leather conditioner is optional but it's really worth the effort.
The Leather Colour Doctor makes a superb leather conditioner that protects and enhances the colour of leather jackets, clothes, shoes, furniture and all kinds of leather items.
Simply wipe a small amount onto the leather with a clean cloth and run into the surface using a circular motion. Leave it to soak into the fibres for several minutes, then buff it with a clean dry cloth.

Who knew that dyeing leather was so easy? If you follow these simple steps, your leather jacket will soon look like new!
Be sure to check out the Leather Colour Doctor's website for a fantastic range of leather care products that will keep your leather goods looking great and prolong their lifespan. You can also check out our post on how to dye a leather sofa.