If You Cant Find A Colour You Need Let Us Know & We Can Make It!
Join Our Distribution Network Europe Or Worldwide > Contact us
If you need some help understanding how to dye your leather car seats, then don't worry. Today we're going to talk you through everything. We'll cover the products we have available that will transform your leather seats and restore them to their former glory, and talk you through the exact process, too.
If you've read some of our other posts about restoring or dying leather upholstery or leather furniture, then you might already be familiar with the method we will discuss below. Still, it's important to read this guide because dying a leather car interior is different to furniture, for example, so some tips below will be especially relevant to your new leather project.
Read on below, and we here at The Leather Colour Doctor will be able to help you transform any leather car seat with a very smooth finish to boot!
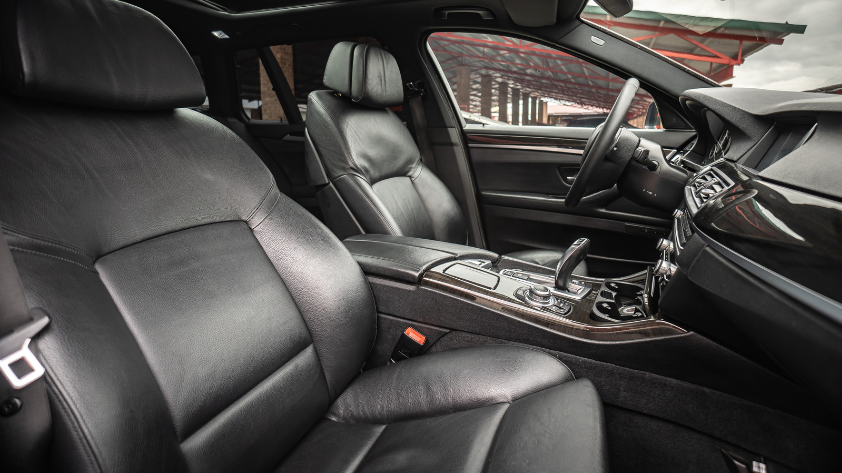
Some leather will make it immediately obvious that it needs some attention. Take a red leather car seat, for example. You'll be able to see instantly if the colour is fading or if the leather is worn or damaged in any way. Other types might not be so obvious.
Generally, though, if your old leather seats are:
then it's time to renew your leather car seats.
But no, you don't need to pay to have them replaced. Below we'll show you how to colour them yourself to make what might otherwise be a hard job easier. Follow our advice, and you'll notice that your leather quickly transforms into something beautiful thanks to our expertise and brilliant products...

To get started, you will need a few different products:
Thankfully, you can find all of these (apart from the filler) in our range of car interior products. You'll notice that we have different products for different modern cars, like Aston Martin, Audi, or Porsche (and many more besides), so how do you choose the right products for you?
The key here is to look through our range of car interior products to find the one that suits your car the best. That means picking up our Ford Capri Raven Grey range, for example, if you drive a Ford Capri with Raven Grey interior.
Take a look through our products and find the one that suits your car best, that way you can get the best results when you start the project.
If we don't yet have a specific kit for your car model, then you might want to try creating your own using our products. You might be able to get a close match, or even change the look of your seats for a fresh new style.
Remember, though, that each kit comes with specially selected cream and dye for the specific leather of the car it's designed for. If it doesn't match exactly, then problems may arise. However, we always advise using our products in an inconspicuous area before applying anything anyway, regardless of whether it's designed specifically for that seat or not. That way, if something goes wrong, it won't ruin the whole seat.
Currently, we don't offer products for other cars that aren't as modern, such as an old Rolls Royce, for example, that may have used Connolly Leather in the manufacturing of the seats. That's not to say that our products wouldn't work with them - but if you decide to use our products for older car models, PLEASE make sure that you do a patch test for each product first. This is key for every car, but especially so for older models with different leather types.
Yes, all of our leather products are designed to work with all sorts of leather. However, you should still do a patch test with every product before committing to using it over the entire seat to be safe.
Once you've found one of our The Leather Colour Doctor kits to help with the project, it's time to actually dye the seats!
Here's what to do:
The first thing you should do is take our leather foam cleaner to help remove any dirt or grime and prepare the area for the other products. You can use a lightly abrasive pad, or a soft plastic scrubbing brush. Just make sure you are applying gentle pressure to ensure it is properly cleaned.
Wipe away using a clean cloth, repeating the process until your cloth wipes away clean. This will ensure you have correctly prepped leather for the next stages.
Our foam cleaner is much kinder to leather than the alcohol cleaner alternatives out there, and the foaming action actually speeds up the cleaning process, too.

Next, you need to prep the leather using our leather preparation fluid. Simply apply it to the seat using a clean cloth in a circular motion to ensure it is worked into the leather. Make sure you don't use excess prep fluid - you aren't trying to drown the seat in liquid, just enough to create a base coat for the other thin layers of product to be applied later.
Make sure you focus on getting the entire seat - this includes the seat flutes, middle flutes, arm rests, headrests, and all contact areas.
If a small amount of colour shows on your cloth, don't panic. This is normal. Our prep fluid helps cut through what is left of the old leather finish, which will allow the other products to properly adhere to the leather.
Once a small amount of colour is showing on your cloth, stop there and move to the next stage.
Here, you may need to fill in any remaining cracks if you have cracked leather. Even a few small cracks will need your attention here.
Simply apply our leather filler using a palette knife in thin coats until all the cracks are filled. Make sure you dry the previous layer using a hair dryer or something similar before you apply the second coat. This will ensure the first layer is dry, and it will help control the amount of product you use.
Use just enough so the cracks disappear. After that, make sure the area is sanded smooth for the next part.
Now it's time for the primer, or leather adhesion promoter. Using this product ensures you get just as successful results each time, and it ensures the leather colourant will stick evenly to the seat.
Apply three layers of the primer all over the seat. Use only a small amount of product but ensure the whole seat is covered. Dry using a hair dryer between coats for fast delivery of results. When applying the second and third coats, make sure you change your wipe direction with the cloth. This will deliver a better finish in the end.
Next up is your leather dye. Apply your first, light coat using a sponge or spray. A sponge is a great option at first to make sure the leather dye is worked into the surface effectively. Dry using a hair dryer before moving on to the next step.
If the leather dye looks patchy at this stage, don't worry - that's normal. You have to build colour using the leather colourant, so dry each painted layer first, and then apply more until you get the desired effect.
As mentioned above, keep applying the dye, drying in between layers, until you get roughly what you set out to achieve - freshly dyed interior. Don't use more than is necessary, or else you will make the seats darker than intended. Just remember to be cautious, and use your judgement when you think the colour matches what you set out to achieve best - and then stop.
Once you're satisfied with the colour of the seat, it's time to seal your work with a beautiful finish. Apply using a sponge, drying in between layers, and applying at a 45-degree angle to scatter light reflection.
Depending on the kit you buy, you may end up with a transparent manufactured finish applied to the leather as the manufacturers had intended, a satin finish, or a matt finish. If you would prefer a different finish, then check out our sealant products to see if you can find one that works for you.
After the sealant has been applied, leave the whole project to set for 24 hours before sitting in your car again.
Hopefully, today's post has taught you that dying your car's interior seats is actually pretty straightforward. Stick to our products here at The Leather Colour Doctor, follow the advice in this guide and on our products, and you'll be able to transform your car's interior in no time at all!